
Here’s a scene that plays out in clinics, wards and home visits every single day. A patient comes in for a ten minute appointment, sits on the exam table, and says, “Is this going to hurt?” The nurse says, “Nope, just a little tugging.” Then comes the part nobody talks about much: the nurse has to look at the wound, decide if it is really ready, pick the right tools, cut in the right place, pull in the right direction, and leave the patient with a wound that stays closed. That’s the job. It looks simple from the outside, and it is not.
Suture removal is one of those tasks that gets filed under “basic skills” in nursing school. You practice on a foam pad or a pig’s foot, you pass the check-off, and you move on. Then real life shows up. The stitches are buried in swollen skin. The patient has diabetes and a wound that looks a little pink at one end. The order says “remove sutures day 10” but the wound is over a knee that bends a hundred times a day. Suddenly the foam pad doesn’t feel so helpful.
Good Nursing Care for Suture Removal is mostly judgment, with a bit of technique on top. Knowing which end of the forceps to hold matters, sure. But knowing when to stop, when to call the provider, and when to leave half the stitches in place matters a lot more. A wound that opens up after you take the stitches out is a bad day for the patient and a worse one for you.
This guide walks through the whole process the way it actually happens. We’ll cover timing by body site, what to check before you touch anything, the exact steps for interrupted stitches, continuous stitches and staples, the mistakes that trip people up, and what to teach the patient before they leave. There are also special sections for kids, older adults, and patients with diabetes or weak immune systems, because those wounds behave differently.
If you are a nursing student, this will help you feel less nervous on your first few removals. If you are a working nurse, maybe it will sharpen a few habits. And if you are a patient or caregiver reading this to understand what happens at the appointment, you will know what good care looks like. Let’s get into it.
What You Will Learn in This Guide
Before diving into the details, here is a quick map of what this guide covers, so you can jump to the part you need. Each section builds on the one before it, but they also stand alone if you only want a refresher on one topic, like staple removal or documentation.
- What sutures are, why they are used, and how absorbable and non-absorbable types differ
- The legal and practical limits of your role, including orders and facility policy
- Typical removal timing for the face, scalp, trunk, limbs, hands, feet and joints
- How to assess a wound and a patient before any stitch is touched
- The exact supplies you need and how to set up your space
- A step-by-step method for interrupted sutures, continuous sutures, staples and skin strips
- The most common mistakes and how to avoid them
- Special care for children, older adults, and patients with diabetes or low immunity
- How to recognize and respond to dehiscence, infection and bleeding
- What to teach patients and caregivers before they go home
- How to chart the procedure so your note actually protects you
- Infection control, sharps safety and home care considerations
- Twelve frequently asked questions answered in plain language
That is a lot of ground, so take it one section at a time. Nobody learns all of this in a single sitting, and honestly, most nurses pick it up over dozens of removals. The goal here is to shorten that learning curve and help you avoid the painful lessons.
What Suture Removal Actually Involves
Suture removal sounds like a single action: snip and pull. In practice, it is a short procedure with several decisions packed inside it. You confirm the order, judge whether the wound has healed enough, clean the area, take out the stitches without pulling bacteria through tissue, and then protect the wound afterward. Understanding what is happening under the skin makes every one of those steps easier to get right.
Why Stitches Exist in the First Place
Stitches hold the edges of a cut together while the body does the real repair work. Within the first few days, skin cells start crawling across the gap and collagen begins laying down a scaffold. By roughly one to two weeks, depending on the site, that new tissue has enough grip to hold on its own. Sutures are basically temporary scaffolding. Leave them in too long and they become a problem, because the body treats them as foreign material.
Types of Closures You Will Meet on the Floor
You will see three main closures. Interrupted sutures are single stitches, each tied off separately, common on faces, hands and traumatic lacerations. Continuous (running) sutures are one long strand looped along the wound, often on surgical incisions. Staples are metal clips, used mostly on the scalp, abdomen, orthopedic incisions and long surgical wounds. Each one needs a slightly different removal technique, which we will walk through in detail later.
Absorbable Versus Non-Absorbable Sutures
Here’s something that saves people embarrassment. Not every stitch needs to be removed. Absorbable sutures, like those made from polyglactin or poliglecaprone, dissolve over weeks and are often used inside the body or under the skin. Non-absorbable sutures, like nylon or polypropylene, stay put until someone takes them out. If you are unsure which type a patient has, check the operative note or procedure record before you start pulling anything.
Nursing Care for Suture Removal: Scope, Orders and Legal Ground
Before you pick up the forceps, you need to be sure the task is actually yours to do, and that someone with authority has asked for it. This is the boring part, and it is also the part that protects your license. Rules differ by country, state and employer, so this section is about the questions to ask rather than one answer that fits everywhere.
Do You Need a Provider’s Order
In most settings, yes. Suture removal is typically done on the instruction of the surgeon, physician, nurse practitioner or physician assistant who placed the stitches or who is managing the wound. The order should say what to remove and roughly when. Some discharge orders say “remove sutures in 10 to 14 days” without more detail, which is a cue to clarify rather than guess.
Your Nurse Practice Act and Facility Policy
A nurse practice act sets the broad limits of what you can legally do, and your employer’s policy narrows it further. Some clinics allow registered nurses to remove sutures on standing orders. Others limit it to certain wound types, or require a provider to look first when the wound is complicated. Read the actual policy document at least once. Most nurses never do, and then get surprised during an audit.
Identity, Consent and Explanation
Even for a quick procedure, you confirm the patient’s identity with two identifiers, explain what you are about to do, and get verbal agreement. Tell them about the pulling sensation and the possible small pinch. Patients who know what to expect stay calmer and move less, which makes the whole thing faster and safer. A rushed, silent removal makes people tense, and tense patients flinch.
Suture Removal Timing: When Stitches Should Come Out
Timing is where a lot of the real nursing judgment lives. Pull stitches too early and the wound can split open. Leave them too long and you get track marks, tissue irritation and a higher chance of infection. The numbers below are typical ranges, and the provider’s order always wins, but knowing the ranges helps you spot an order that looks off.
Face and Neck
The face heals fast because of its excellent blood supply. Sutures here usually come out in about 3 to 5 days, sometimes up to 7 on the neck. Leaving facial stitches in longer risks visible cross-hatch scars, which patients absolutely notice. Many providers pair early removal with skin strips afterward, so the wound keeps support while the stitch marks have no time to form.
Scalp, Trunk and Arms
Scalp stitches or staples typically stay in around 7 to 10 days. Wounds on the chest, abdomen and back often go 7 to 14 days, with the back sometimes longer because that skin is thick and under constant tension. Upper arms usually fall near 7 to 10 days. Surgical abdominal incisions can vary quite a bit depending on the surgeon, the patient’s nutrition and how the closure was done.
Hands, Legs, Feet and Joints
These sites heal slowly because they move constantly or have weaker circulation. Expect about 10 to 14 days for hands and legs, and 14 days or longer for feet, knees, elbows and other joints. A wound over a knuckle, for example, gets stretched every time the patient makes a fist. Some providers splint the joint or remove only alternate stitches first, which is something worth knowing.
Factors That Move the Date
The calendar is a starting point, not a rule. Diabetes, steroid use, smoking, poor nutrition, obesity, older age and wound tension all slow healing. A patient on long-term prednisone might need extra days. A healthy twenty-year-old with a clean facial laceration might be ready early. Look at the wound itself, not just the date on the paper.
Nursing Care for Suture Removal: Assessment Before You Touch the Wound
Good removal starts with good looking. Before any equipment comes out, you take a minute to examine the wound and the person attached to it. This quick assessment decides whether you go ahead, remove only some stitches, or call the provider. Skipping it is the single most common way a routine removal turns into an incident.
Reading the Wound Itself
Check whether the edges are meeting neatly and look sealed. Healed wounds usually show closed edges, a thin pink ridge and little drainage. Warning signs include gaping edges, redness spreading beyond the line, warmth, swelling, pus, a foul smell, or a wound that looks wet and open between stitches. If you see these, hold off and contact the provider before removing anything.
The Patient’s Story and History
Ask how the wound has felt. Has the pain been getting better or worse? Any fever, chills, or drainage on the dressing? Check allergies to tape, latex or antiseptics, and review conditions that affect healing like diabetes, anemia, immune problems or long-term steroids. Also ask about blood thinners, because patients on warfarin or similar drugs may bleed a little more once stitches are out.
Pain, Fear and Positioning
Most people tolerate removal fine, but some are really nervous, especially kids and anyone who had a rough time getting the wound in the first place. Offer simple things first: explain each step, let them look away, use slow breathing. Position the area so it is relaxed, well lit and at a comfortable working height. A relaxed limb makes cleaner cuts and less pulling on skin.
Supplies and Setup for Suture Removal
Nothing makes a procedure feel worse than running out of something halfway through. A few minutes of setup saves you from leaving a patient sitting with half their stitches out while you hunt for gauze. Gather everything first, put it within arm’s reach, and make sure the lighting lets you actually see the knots.
What Goes in a Suture Removal Kit
Prepackaged sterile kits are common and usually include small curved or straight scissors or a stitch cutter, fine-tooth forceps, and a couple of gauze pads. Staple removal kits include a staple extractor, which is a specialized tool with a lower jaw that slides under the staple. You will also want gloves, saline or antiseptic solution, skin closure strips, a clean dressing and a sharps container within reach.
Setting Up the Space
Wash the surface, lay out a clean field, and open your supplies without touching the contents. Make sure you have a good light, ideally a movable lamp, and a seat so you are not bending awkwardly. Place the sharps container close, because carrying a used blade across the room is how needlestick injuries happen. Tidy setup also signals competence to the patient.
Hand Hygiene and Gloves
Wash your hands or use alcohol rub before opening anything, then put on gloves. Clean gloves are accepted in many settings for removal, but your facility may want sterile gloves for certain wounds. Change gloves if they touch anything non-sterile. It sounds fussy, but the wound has already been through enough, and a small lapse here can cause the very infection you are trying to avoid.
Step-by-Step Nursing Care for Suture Removal
Now the hands-on part. The sequence below works for most wounds with interrupted stitches, and then we cover the differences for running sutures, staples and subcuticular closures. Go slowly the first dozen times. Speed comes from smooth repetition, and rushing is how people cut the wrong thread or tug too hard.
Step One: Verify, Explain and Prepare
Check the order, confirm the patient’s identity with two identifiers, review allergies, and explain what will happen. Perform hand hygiene and gather supplies. Position the patient and expose only the area you need. Remove the old dressing gently, wetting it with saline if it is stuck. Look at the wound one more time with good light before moving on.
Step Two: Clean the Site
With gloves on, clean the wound and surrounding skin using saline or the antiseptic your facility prefers, working from the incision outward. This removes dried blood and crust that hides the knots and can carry bacteria along the thread. Let the skin air dry briefly, then pat dry with gauze. Crusting over the stitches is common, and softening it first makes removal far gentler.
Step Three: Removing Interrupted Sutures
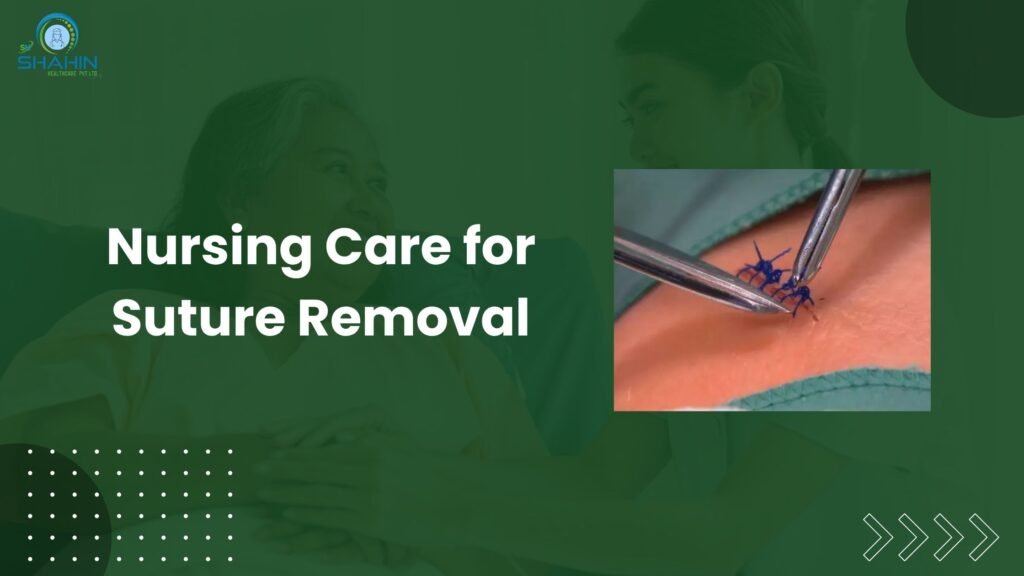
Grasp the knot with forceps and lift it slightly away from the skin to expose a bit of the thread that was under the surface. Slide the scissor tip in and cut that clean, unexposed section as close to the skin as you can, on one side of the knot only. Then pull the knot gently toward the wound line, not away from it, so the stitch slides out without tugging the edges apart.
Why Direction and Cutting Point Matter
The visible part of a stitch has been sitting outside the body and picking up bacteria. If you cut at the knot’s far side and drag that exposed thread through the tract, you pull contamination into the tissue. That is why you cut the hidden section near the skin. Pulling toward the wound line also keeps the edges pressed together instead of splitting them apart as the thread exits.
Step Four: Continuous and Subcuticular Sutures
A running stitch is removed by cutting the strand at several points, usually at both ends and sometimes in the middle, then pulling each section out one piece at a time. Take the same care about direction. Subcuticular stitches sit beneath the skin and have a loose end poking out at each side. Cut one end flush at the skin and gently pull the other end through, using steady, even traction.
Step Five: Removing Staples
Place the lower jaw of the extractor under the staple and squeeze the handle. The tool bends the staple in the middle, which lifts both ends out of the skin. Lift away gently and drop it into a sharps container. For long incisions, many nurses remove every other staple first, then check the edges before taking the rest. It gives you a chance to catch trouble early.
Step Six: Skin Strips and Final Cleanup
If the provider ordered it or the wound looks like it needs support, apply skin closure strips perpendicular to the incision. Dry the skin first so they stick. Clean away any blood, then apply a light dressing if needed. Count the stitches you removed against the number documented, because a leftover piece buried in a scab can cause months of irritation.
Common Suture Removal Mistakes Nurses Make
Everyone makes a few of these at some point. The trick is making them once, noticing, and not repeating them. Most mistakes come from being in a hurry, trusting the calendar instead of the wound, or skipping the boring parts like counting stitches. Let’s go through the ones that cause the most trouble.
Removing Everything Without Looking
The order says day 10, so out they all come. Except the wound is gaping at one end and weeping a little. Look. If the wound is not holding, take out nothing and call. Even a partial removal, leaving the tense areas for a few more days, is a perfectly valid decision, and providers appreciate being asked rather than surprised.
Cutting in the Wrong Spot
Cutting the thread on top of the knot or in the middle of the visible part means you drag contaminated suture through the tract, or worse, leave a tiny knotted fragment behind. Always lift the knot, expose the buried thread, and cut there. If you accidentally cut a stitch twice and lose a piece, stop and find it before moving on.
Forgetting to Count
You should know how many stitches or staples were placed. The operative note or discharge paperwork usually tells you. Counting what you remove and comparing takes five seconds and prevents retained material. It is one of those habits that feels unnecessary right up to the day it catches something.
Pulling Hard on Stuck Sutures
When a stitch will not budge, a lot of people yank. Don’t. The skin may have grown over the thread, or the stitch may be embedded in swollen tissue. Soften the crust with saline, re-check your cut, and use a bit more light. If it is truly buried, a provider may need to open the skin slightly to retrieve it.
Skipping the Teaching
A clean removal can still go wrong at home. If the patient does not know to keep the area clean, avoid stretching it, or watch for infection, the good work gets undone within days. Teaching takes two minutes and it is part of the procedure, not an optional extra. We cover exactly what to say in a later section.
Nursing Care for Suture Removal in Special Patients
The steps stay the same, but the thinking changes. A toddler, an eighty-six-year-old with paper-thin skin and a diabetic with a slow-healing foot wound are three very different removals. Knowing how each group behaves lets you adjust timing, technique and teaching so the wound has the best chance of staying closed after you leave.
Children and Anxious Patients
Kids are usually more scared of the idea than the actual feeling. Show the tools, let them touch the gloves, and explain in plain words: “It might feel like a tiny tug, like pulling a hair.” Use distraction, a tablet, a parent’s voice, a song. Get a second person to help hold the limb gently if needed. Never promise it won’t feel like anything, because kids remember being lied to.
Older Adults and Fragile Skin
Older skin tears easily and heals more slowly, so stitches often need a few extra days. Use very gentle traction, and consider skin closure strips right after removal for extra support. Be careful with adhesive, because stripping tape can peel skin. Ask about blood thinners, check nutrition and hydration, and pay attention to dementia or hearing issues that might make the person pull at the wound later.
Diabetes and Poor Circulation
High blood sugar slows healing and raises infection risk, especially on feet and lower legs. These wounds often need longer before stitches come out, and the provider may want to see them first. Look carefully for redness, swelling, drainage and numbness. Ask about recent blood sugar readings. A foot wound that looks “fine” can hide trouble, so lean toward calling rather than assuming.
Steroids, Immune Problems and Obesity
Patients on long-term steroids, chemotherapy or immune-suppressing drugs often heal slowly and may show fewer obvious infection signs. People with higher body weight have more skin tension and moisture, particularly in folds and abdominal incisions, which can strain wound edges. In both groups, remove stitches in stages if needed, support the wound with strips, and give very clear instructions about what to watch for.
Complications During and After Suture Removal
Most removals go smoothly, but you should be ready for the few that do not. Recognizing a problem early, and knowing the first thing to do, keeps a small issue from becoming a hospital visit. Stay calm, stop what you are doing, and treat the patient first. You can sort out paperwork afterward.
Wound Dehiscence (The Wound Opens)
If the edges start to separate as stitches come out, stop. Don’t remove more. Apply gentle pressure with clean gauze, bring the edges together, and apply skin closure strips if your policy allows. Then contact the provider right away. Small superficial gaps may be managed with strips, but deeper separation can need re-suturing. Document what you saw, what you did, and who you called.
Bleeding
A few drops of blood are normal. Steady oozing is not unusual in patients on anticoagulants or aspirin. Apply firm direct pressure with gauze for several minutes without peeking. If bleeding keeps going, soaks through the dressing, or spurts, notify the provider immediately. Never ignore bleeding in a patient who takes blood thinners, since small ones can add up over time.
Signs of Infection
Infection can appear before or after removal. Watch for spreading redness, increasing pain, warmth, swelling, pus, foul smell, or fever. If you see these before removal, pause and call. After removal, patients should know to report them quickly. Wounds that look angry and are tender around the edges need a provider’s assessment, since antibiotics or drainage might be needed.
Retained Suture Material and Scarring
A missed stitch fragment buried under a scab can cause redness, a small lump, or a wound that never quite closes. Count what you removed against what was placed. For scarring, stitches left too long create the classic railroad track marks. You cannot fix a scar once it has formed, but you can prevent a lot of it with correct timing and gentle technique.
Patient Education After Suture Removal
What you say at the end of the visit matters as much as what you did at the start. Patients walk out with a freshly healed but still delicate wound. Clear, short instructions, preferably written down, help them protect it. Cover the basics, check that they understood, and invite questions before they leave.
Keeping the Wound Clean and Protected
Tell patients they can usually wash gently with mild soap and water after 24 to 48 hours, then pat dry. No scrubbing, soaking in baths, pools or hot tubs until the provider says it’s okay. If skin strips were applied, leave them alone. They fall off in about a week or two. Trimming the curled edges with clean scissors is fine.
Activity, Tension and Movement
Stretching new skin can reopen it. After removal from a joint or the abdomen, ask the patient to avoid heavy lifting, strenuous exercise and repetitive bending for the time the provider recommends, often a couple of weeks. Walk them through real examples. “Don’t carry the groceries with that arm” lands better than “limit physical activity.”
Sun Protection and Scar Care
New scars darken easily in sunlight, and this can be permanent. Recommend sunscreen or clothing coverage over the area for about six to twelve months. Gentle massage and silicone gel or sheeting can help some people once the wound is fully closed, but only with the provider’s approval. Be honest that scars fade over months, not days.
When to Call the Provider
Give patients a short, concrete list. Call if the wound opens, bleeds steadily, drains pus, becomes more red, hot, swollen or painful, or if fever develops. Provide a phone number, not just advice to “contact your doctor.” People hesitate to call over “small” problems, so tell them calling early is exactly what you want.
Documenting Suture Removal Properly
If it is not charted, it did not happen. Documentation protects the patient, since the next nurse sees what was done, and it protects you if anyone asks questions later. A good note takes two minutes and is plain, factual and specific. Vague entries like “sutures removed, tolerated well” tell nobody anything.
What Every Note Should Include
Record the date and time, the provider’s order, wound location, type of closure, and the number of sutures or staples removed. Describe the wound’s appearance before and after, including edges, color, drainage and swelling. Note how the patient tolerated it, any skin strips or dressing applied, and the education you gave. Finish with any follow-up instructions and who was notified.
A Sample Note That Actually Works
Something like this: “Per Dr. Rao’s order, 8 interrupted nylon sutures removed from right forearm laceration, day 10. Wound edges well approximated, no redness or drainage. Site cleaned with saline. Skin closure strips applied. Patient tolerated well, reported mild pulling only. Instructed on care, sun protection and signs of infection. Verbalized understanding.” It is short, but nobody is left guessing.
Documentation Gaps That Cause Trouble
The common ones are missing counts, no wound description, no mention of patient education, and no record of provider contact when something looked off. Another is copying a previous note and forgetting to update details. If you called the provider about a concern, write down who, when and what they said. That single line has saved many nurses.
Infection Prevention and Safety During Suture Removal
Suture removal is a minor procedure, but it still involves an open or recently closed wound, sharp tools and body fluids. Basic infection control keeps the patient and you safe. None of this is complicated, it just needs to be a habit instead of an afterthought on busy days.
Clean Technique, Sterile Technique and What Policy Says
Many facilities accept clean technique for routine removals: clean hands, clean gloves, sterile instruments from a kit. Others require sterile gloves, especially for deeper or higher-risk wounds. The key is not touching sterile items with anything non-sterile. Follow your policy, and if in doubt, go with the stricter approach. It costs very little.
Sharps Safety
Blades, scissors tips and staples are all sharps. Keep the container within reach, never recap or hand sharps person to person, and dispose of everything right after use. A staple tossed on a tray can stab the next person who cleans it. Report any needlestick or cut right away, since early follow-up can matter if exposure occurred.
PPE and Cleaning Up
Gloves are standard, and you add a mask, eye protection or gown if splashing is possible, like with a draining or infected wound. After the procedure, remove gloves properly, wash your hands, and clean the surface and reusable equipment according to policy. Put soiled dressings in the right waste bag. These small steps stop germs from traveling to the next patient.
Suture Removal at Home and in Community Settings
Not every removal happens in a clinic. Home health nurses, school nurses, occupational health staff and rural clinic nurses often remove stitches with fewer resources and no provider nearby. That changes how you prepare and how you decide, because help is not down the hall. Planning ahead and knowing your limits matters even more.
Home Health Considerations
Bring your own sterile kit, clean field, gloves, saline, strips, dressings and a portable sharps container. Check the lighting, since some homes are dim. Make sure you have the order and a way to reach the provider by phone. Pets, kids and cramped rooms add challenges, so choose a clean, stable surface and keep supplies off the floor.
Rural and Low-Resource Settings
In places with limited supplies, you improvise within safe limits. A sterilized pair of small scissors and fine forceps can do the work if prepared correctly. Clean water and basic antiseptic cover cleaning. The principle stays the same: clean hands, careful technique, check the wound first. If anything looks wrong, arrange referral rather than pushing on alone.
Knowing When to Send the Patient Back
Some wounds should go straight back to the provider: signs of infection, wounds that gape, deep wounds, wounds near eyes or major joints, stitches you cannot find or cannot loosen, and anything that feels off. Sending a patient back is not a failure. It is a good decision, and a patient with a healed wound is the real goal.
Conclusion
Suture removal looks like a five-minute task, and mostly it is. But the five minutes come with a lot of small decisions, and good nurses make them without fuss. Check the order. Look at the wound. Clean it. Cut in the right place, pull in the right direction, count what you take out, and teach before the patient leaves.
Habits Worth Building Early
Start with a routine you repeat every time: order, identity, assessment, setup, removal, strips, teaching, documentation. Routines are not boring, they are protection against skipping something on a bad day. After a few dozen removals, the steps feel automatic and you can spend your attention on the patient, which is where it belongs.
A Word for Students and New Nurses
You will be nervous the first time, and that is okay. Ask to be observed, ask what the preceptor looks for, and don’t be shy about saying “I want to double-check this wound with you.” Experienced nurses have all made the mistakes in this guide at least once. Careful beginners usually turn into excellent nurses.
The Bottom Line
Good Nursing Care for Suture Removal is calm, observant and unhurried. Patients may forget your name, but they will remember whether it hurt, whether the wound stayed closed and whether someone explained things clearly. Get those three right and you have done the job well, every single time.
Frequently Asked Questions
Here are answers to the questions nurses, students and patients ask most often about suture removal. Use them as a quick reference or share them with patients who want a plain explanation of what to expect and how to protect their wound afterward.
1. Does suture removal hurt?
For most people it does not really hurt. Patients usually feel a light tugging or a brief pinch as each stitch slides out. Sensitive areas like the fingers or face can feel a bit sharper. Explaining what to expect, softening crusts with saline, and moving gently all make the experience more comfortable.
2. How long do stitches stay in before removal?
It depends on the body site. Faces usually need about 3 to 5 days, scalps and arms around 7 to 10, trunks 7 to 14, and hands, legs and joints about 10 to 14 days or longer. The provider’s order always takes priority, and the actual wound condition should guide the final decision.
3. Can a nurse remove sutures without a doctor present?
In many settings, yes, as long as there is a valid order and facility policy allows it. The nurse practice act in your region and your employer’s rules set the exact limits. Complicated wounds, signs of infection or unclear orders usually mean a provider should check the wound first.
4. What should I check before removing stitches?
Confirm the order and patient identity, then examine the wound. Look for closed edges, minimal redness, no pus and no swelling. Review allergies, medical conditions like diabetes, and medications such as blood thinners. If anything looks unusual, pause and contact the provider before continuing the removal.
5. What supplies are needed for suture removal?
You need gloves, a sterile suture removal kit with forceps and small scissors or a blade, saline or antiseptic, sterile gauze, skin closure strips, a dressing if needed and a sharps container. For staples, add a staple extractor. Gather everything before starting so you are not scrambling mid-procedure.
6. What happens if the wound opens during suture removal?
Stop immediately and do not remove any more stitches. Apply gentle pressure with clean gauze, bring the edges together and use skin closure strips if your policy permits. Contact the provider promptly. Document what happened, the actions you took and who you spoke to, including the time.
7. Do all stitches need to be removed?
No. Absorbable stitches dissolve on their own over weeks and are often used under the skin or inside the body. Non-absorbable stitches, like nylon, must be taken out. Check the procedure record or ask the provider if you are unsure which type was used.
8. How do I remove staples safely?
Slide the lower jaw of the staple extractor under the staple and squeeze the handle. The staple bends in the middle and lifts out of the skin. Place it straight into a sharps container. For long incisions, remove every other staple first, check the wound edges, then take out the rest.
9. What should patients do after stitches are removed?
Keep the area clean and dry for the first day or two, then wash gently with mild soap and water. Avoid soaking, heavy lifting and stretching the area. Leave skin strips alone until they fall off. Use sunscreen over the scar for several months and report any signs of infection.
10. How can I tell if the wound is infected?
Look for increasing redness that spreads, warmth, swelling, worsening pain, pus or drainage, a bad smell, or fever. Any of these warrants a call to the provider. Patients should be told to report them early, since quick treatment prevents bigger problems down the line.
11. Why do you cut the stitch near the skin and not at the knot?
The visible part of the stitch has been exposed to the outside and carries bacteria. Cutting the buried section close to the skin lets you pull the knot out without dragging that contaminated portion through the tissue. It lowers the infection risk and also keeps the wound edges from being pulled apart.
12. What if a stitch is stuck or buried in the skin?
Do not yank it. Soften crust with saline, use better lighting and gently try again. If skin has grown over the stitch or swelling is burying it, stop and ask the provider to take a look. Sometimes a small opening is needed to retrieve it safely.
13. Can children have stitches removed by a nurse?
Yes, with the same order and assessment process. The difference is approach. Explain what will happen in simple language, allow distraction, and have a parent nearby. A calm, honest tone works better than telling a child it will not feel like anything at all.